
I’m sharing a simple organic trick to help any type of rose cutting root quickly using what you already have at home. This method works with all types of roses, from classic English roses to your favourite local roses. The steps are simple, but accuracy is important.
Start with a healthy rose stem. Remove all leaves and trim to about 15 cm. Be gentle to protect the flower bud where new life is quietly forming.
Cut at a 45 degree angle to create an open cut, allowing nutrients to easily penetrate and stimulate root growth. Keep the cutting clean and fresh. Work with sharp, sanitized tools for the best start.
1. Rose Cutting Propagation – Egg and Lemon Tonic
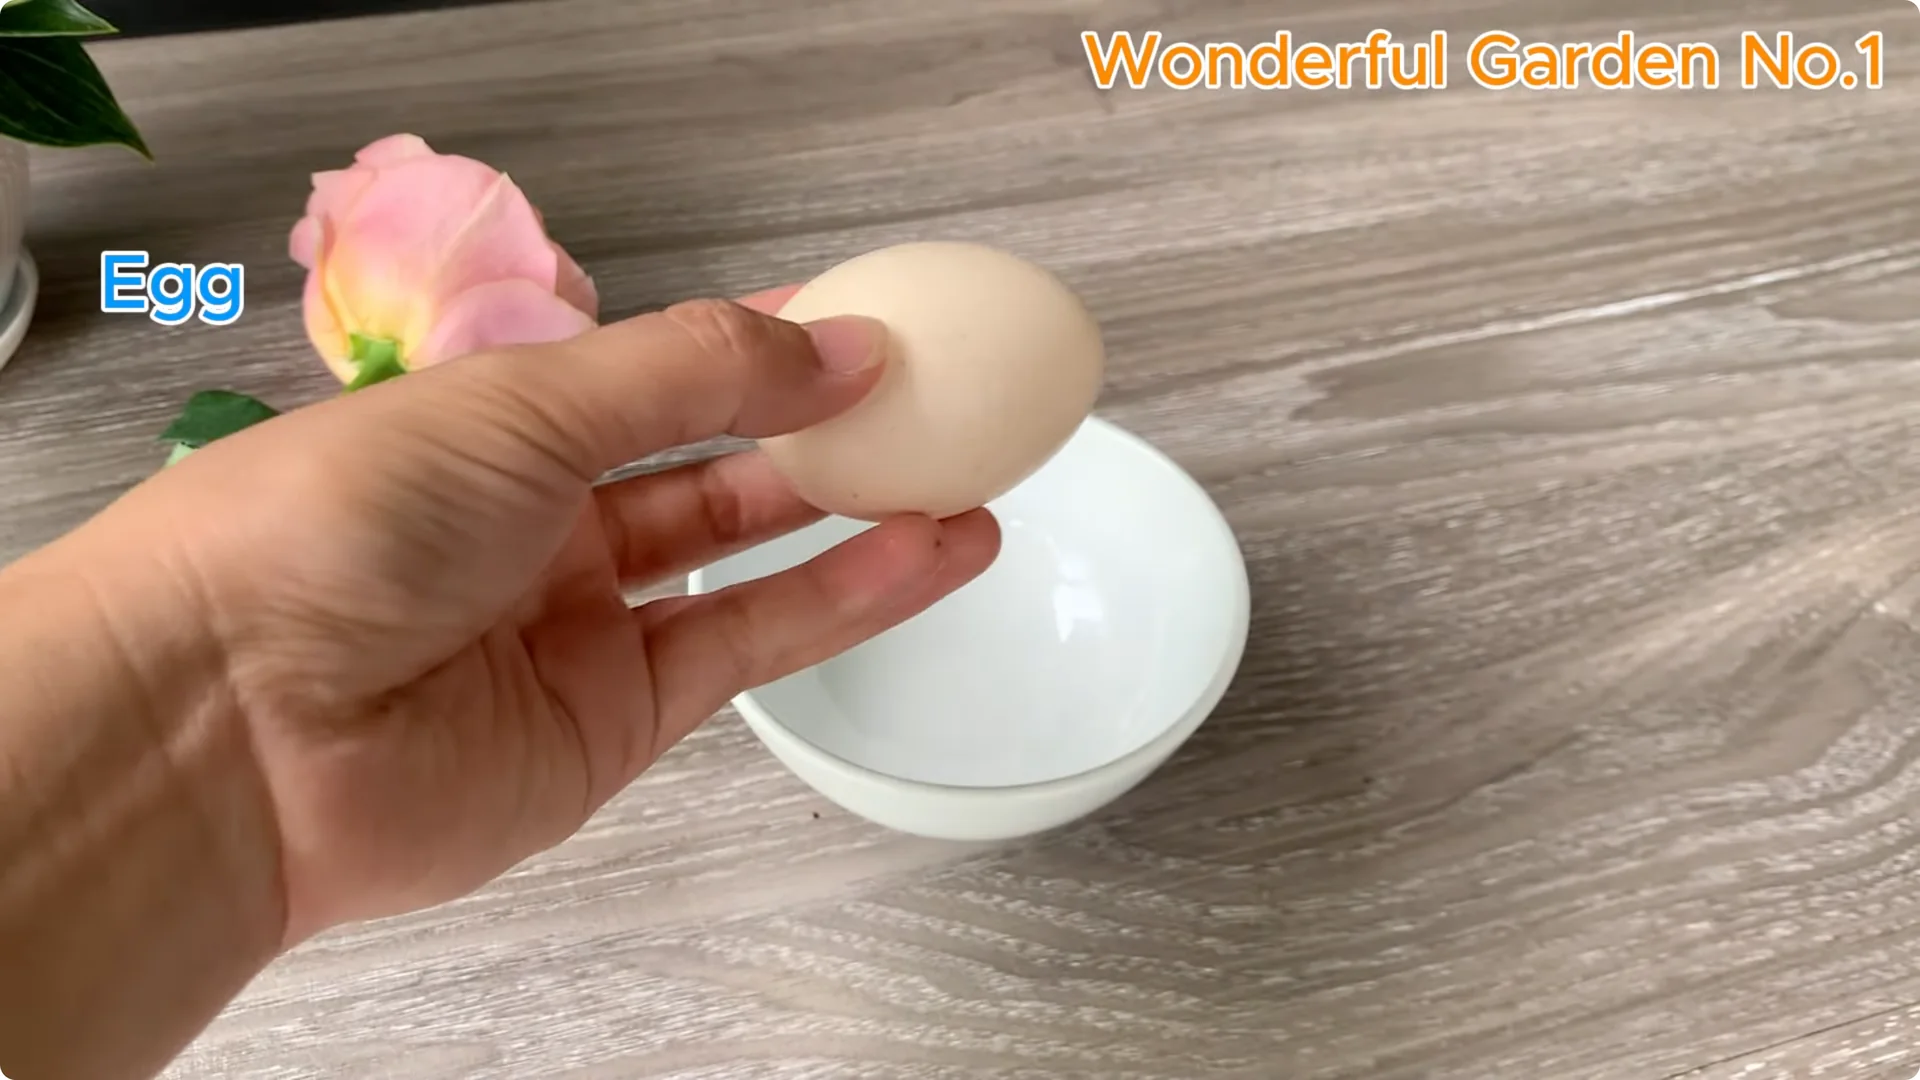
Prepare the mixture
Here’s the surprise: we’re going to use an egg in a way you might not expect. Gently separate the yolks from the whites. A little trick I learned – cooling the eggs first will make the yolks firmer and less likely to crack.
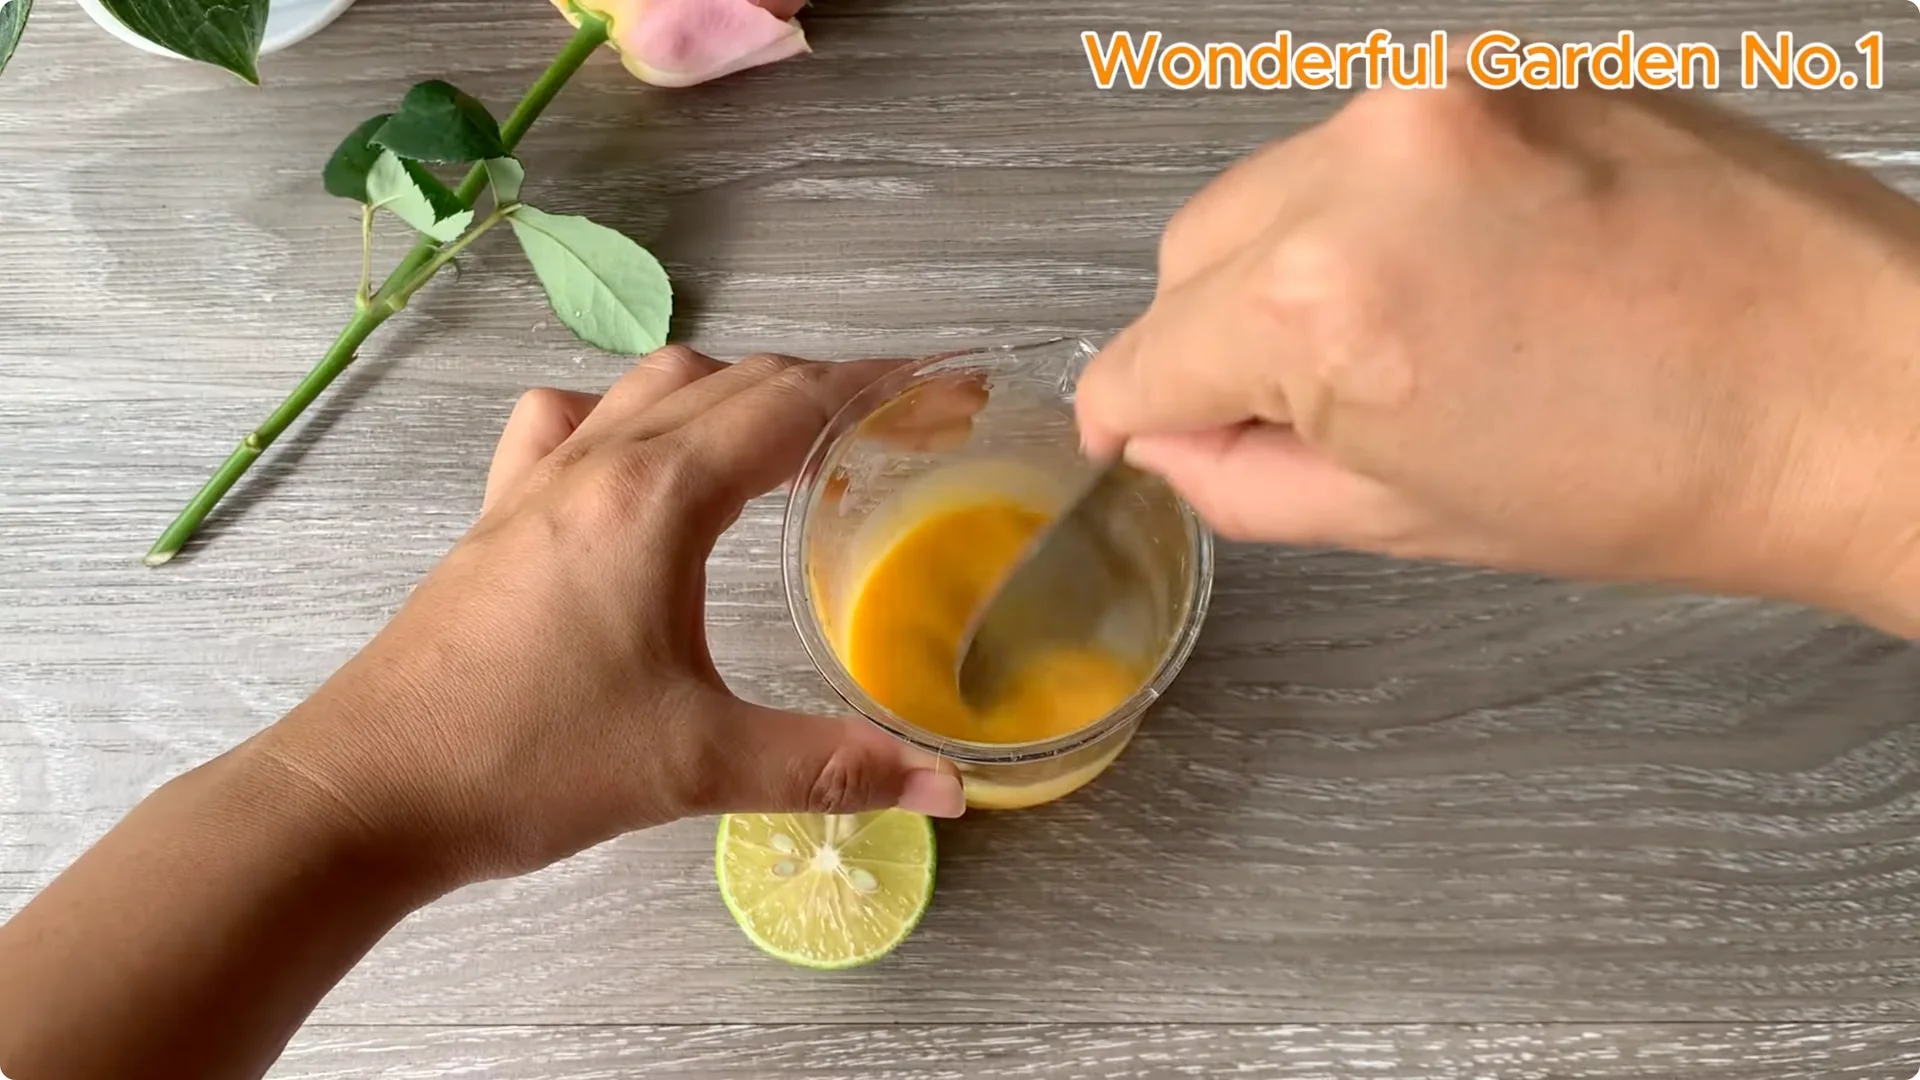
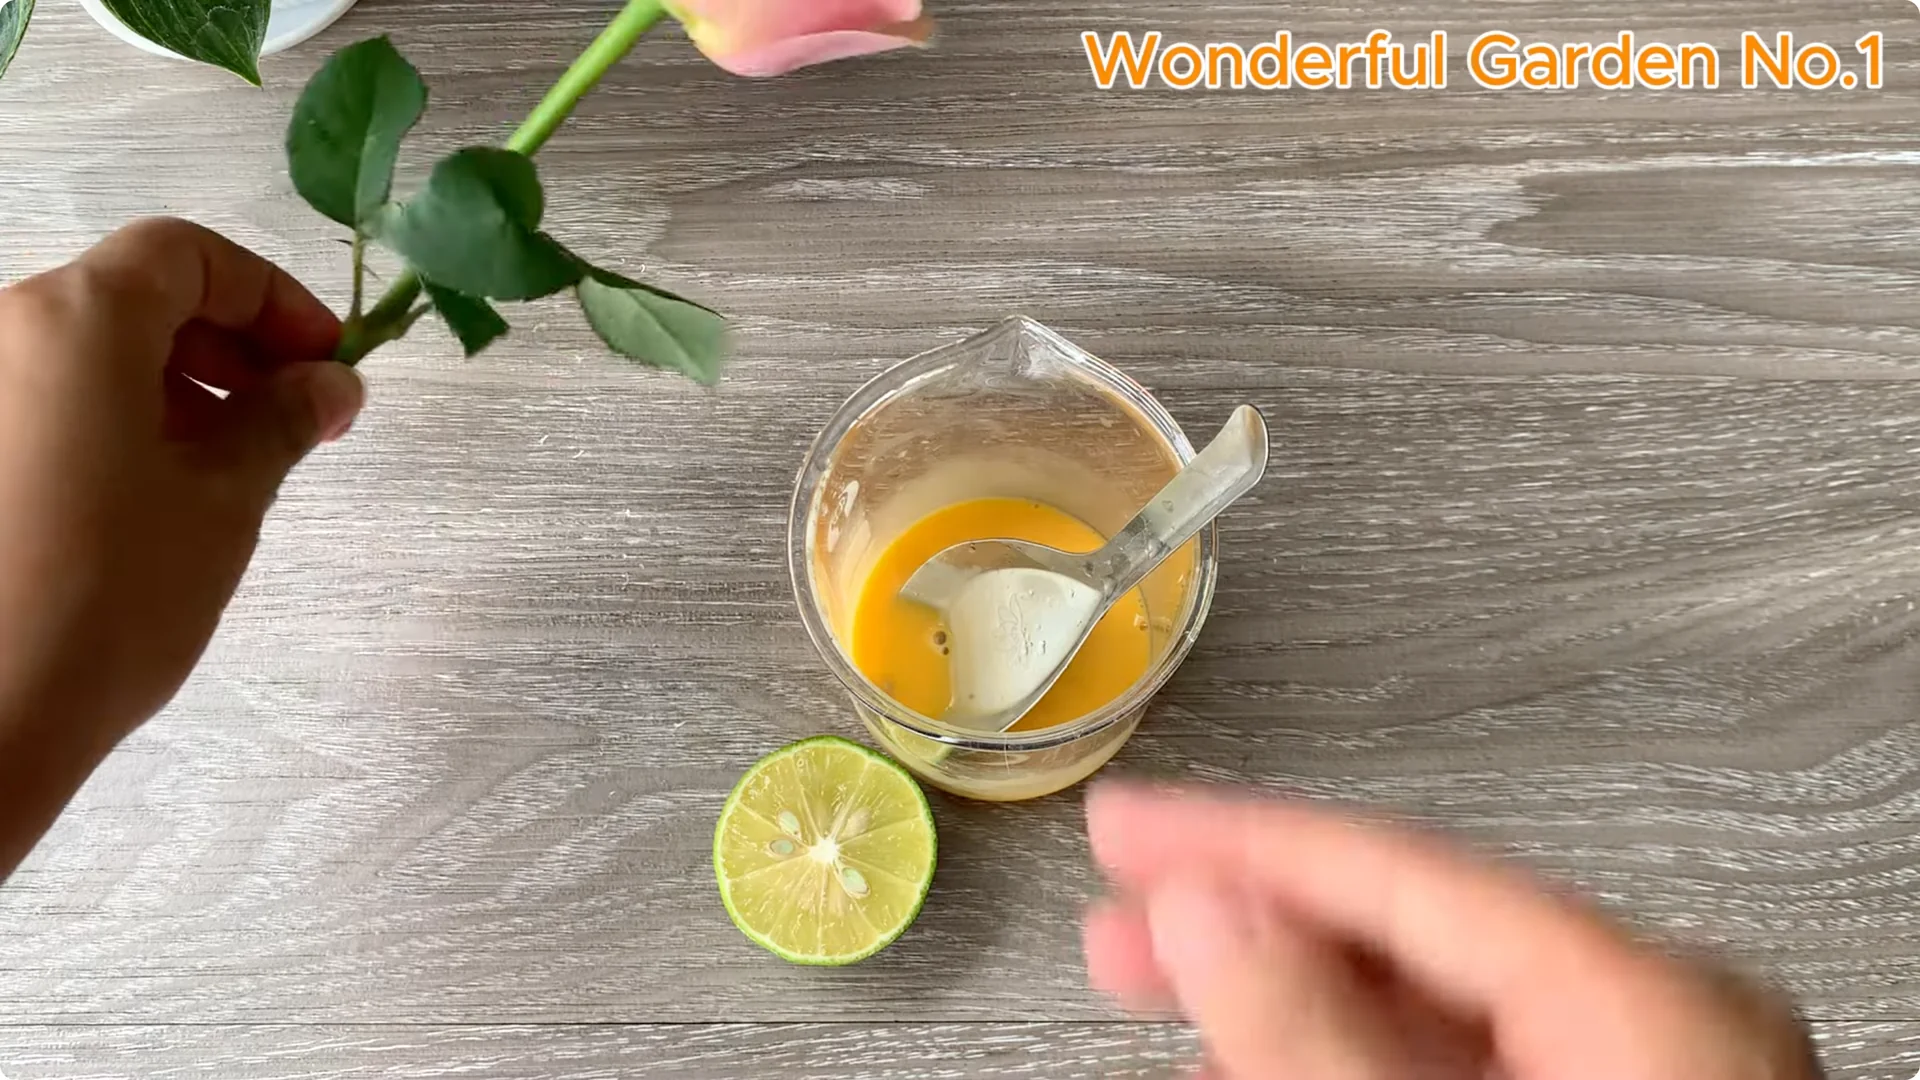
Now for the secret ingredient – a lemon. Squeeze the lemon juice into the egg. Stir until smooth – it should be creamy, almost like a natural tonic.
Soak the cutting
Dip the base of the rose stem in this mixture for about 10 minutes. This is a natural rooting stimulant that is gentle, powerful, and surprisingly effective. Set the cutting aside while you prepare the next booster.
Read More: Rose Branch Water Overnight
2. Rose Cutting Propagation – Garlic Booster
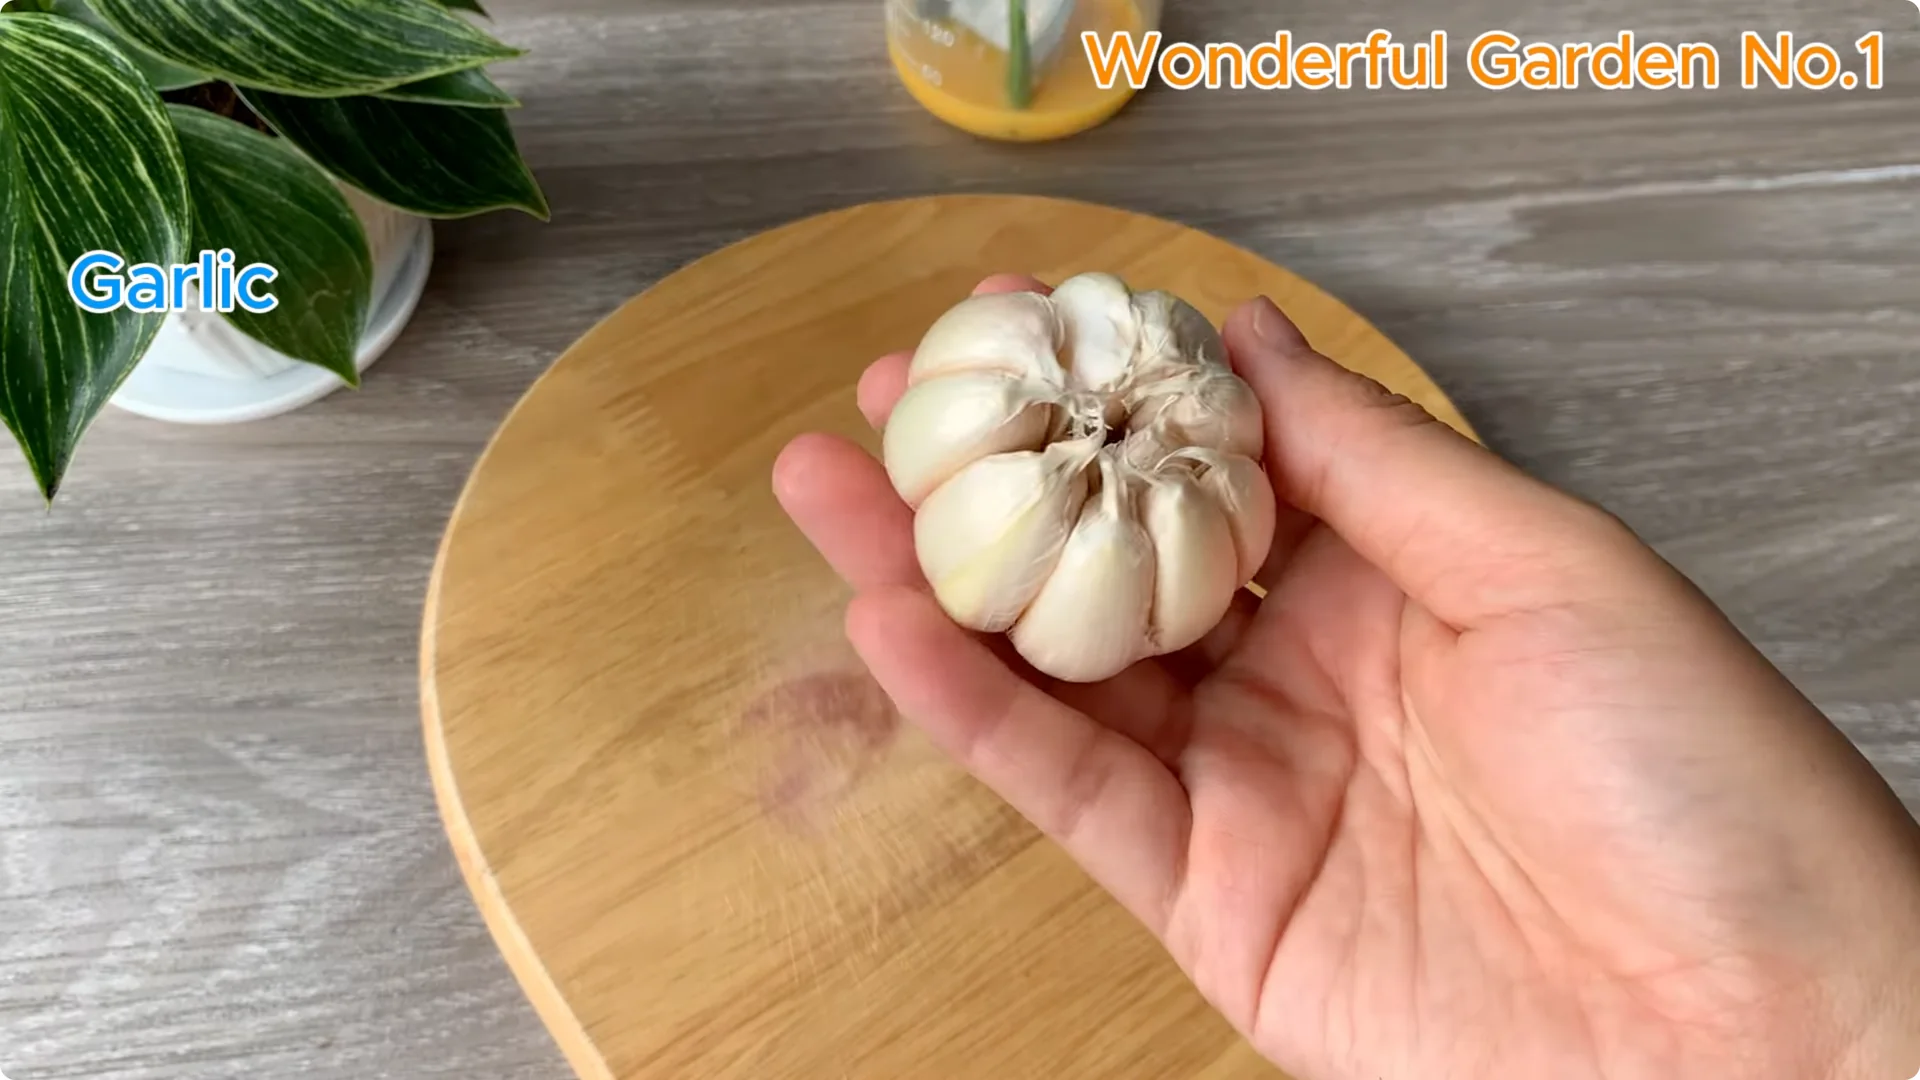
Crush and activate
Now on to the next natural food booster – garlic, a kitchen staple with huge benefits. Take 5 cloves of garlic and carefully peel them, then chop them into small pieces to make them easier to grind. If you have a hand blender, grind the garlic into a fine paste, or use a mortar and pestle if you prefer the old fashioned way.
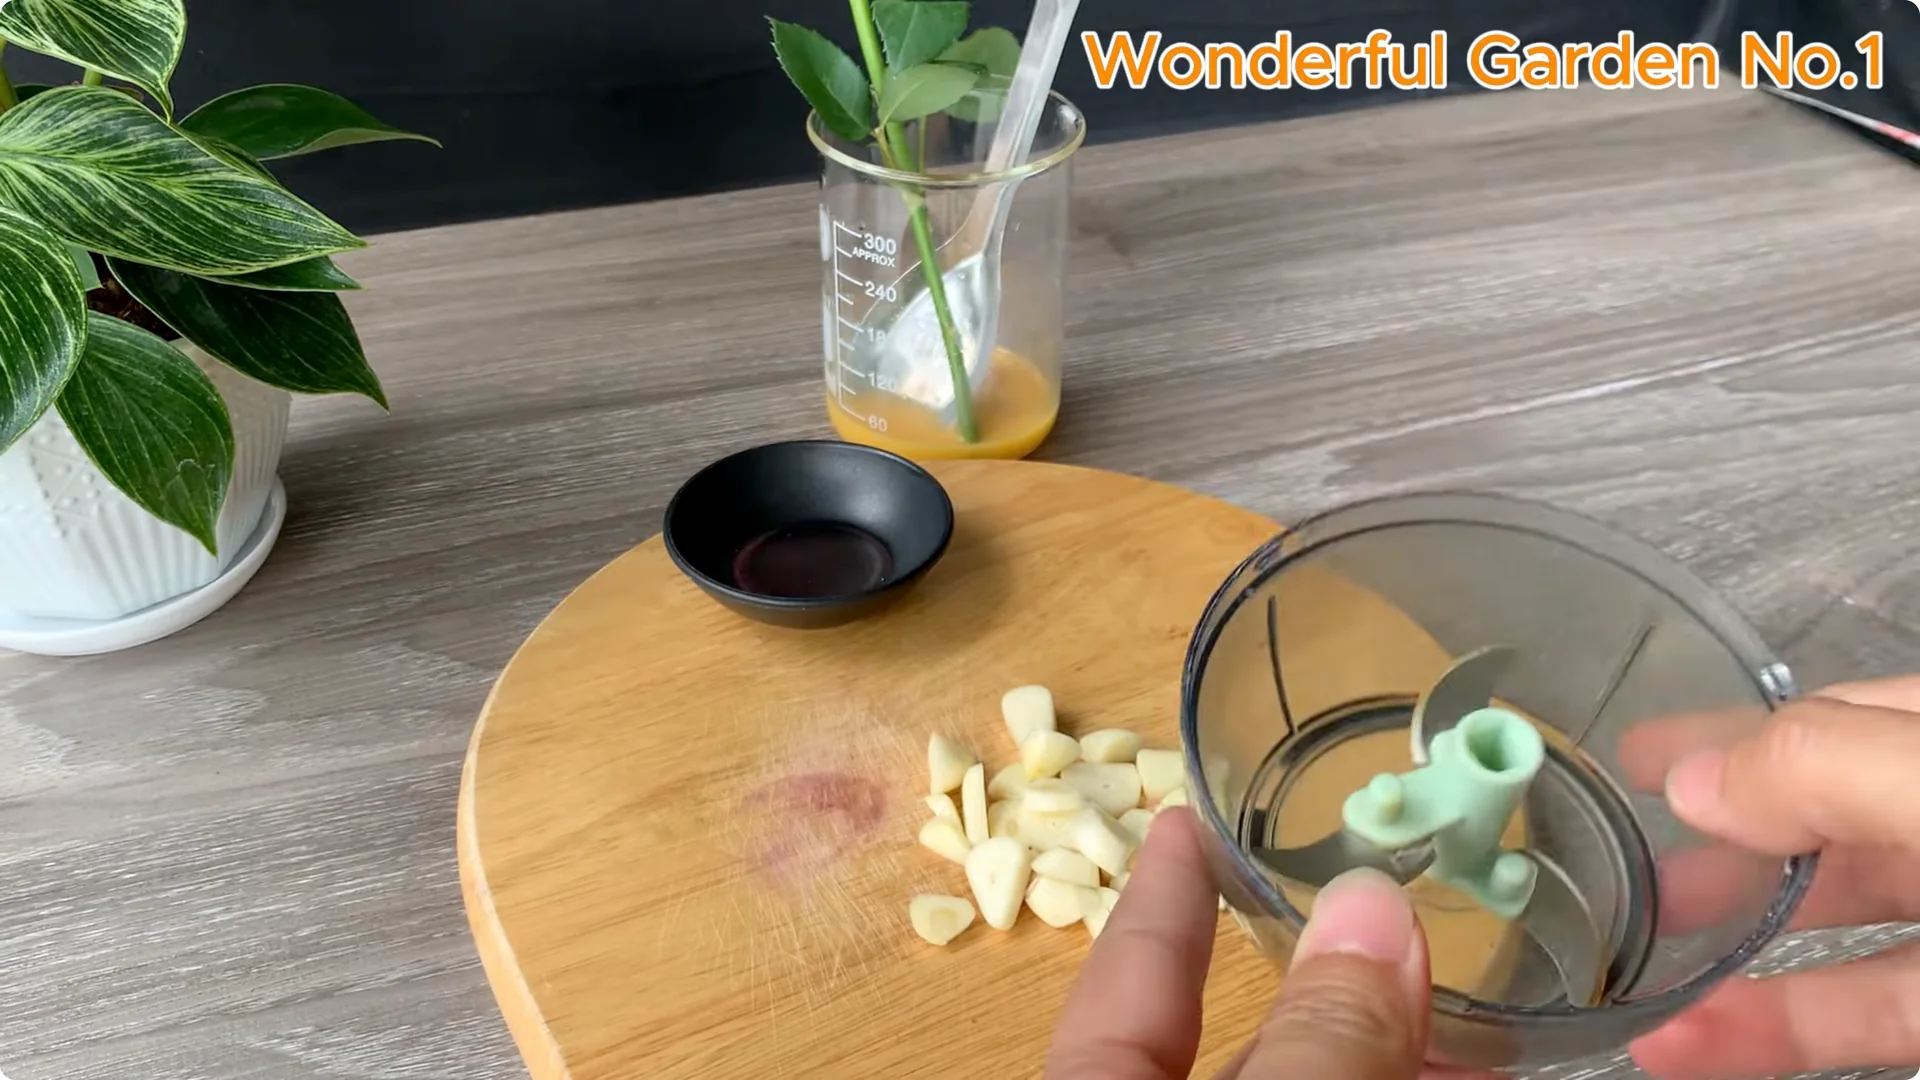
Crushing garlic activates allicin, a natural substance that not only protects against bacteria but also promotes strong root growth. Once the garlic has been crushed, transfer it to a clean glass jar. Add context and care to this step – clean tools help protect tender cuttings.
For a deeper look at this ingredient, see how garlic can transform a rose branch. It pairs beautifully with this gentle approach. Keep your preparation fresh and covered until you blend.
Blend with citrus, rice, and water
Squeeze the juice from the remaining half of the lemon into a cup, then slice the peel and add it. Lemon juice is rich in citric acid, which helps balance pH levels and acts as a natural disinfectant protecting the cuttings from harmful bacteria. Even the peel contains essential oils that have a mild antibacterial effect and contribute to a healthier root environment.
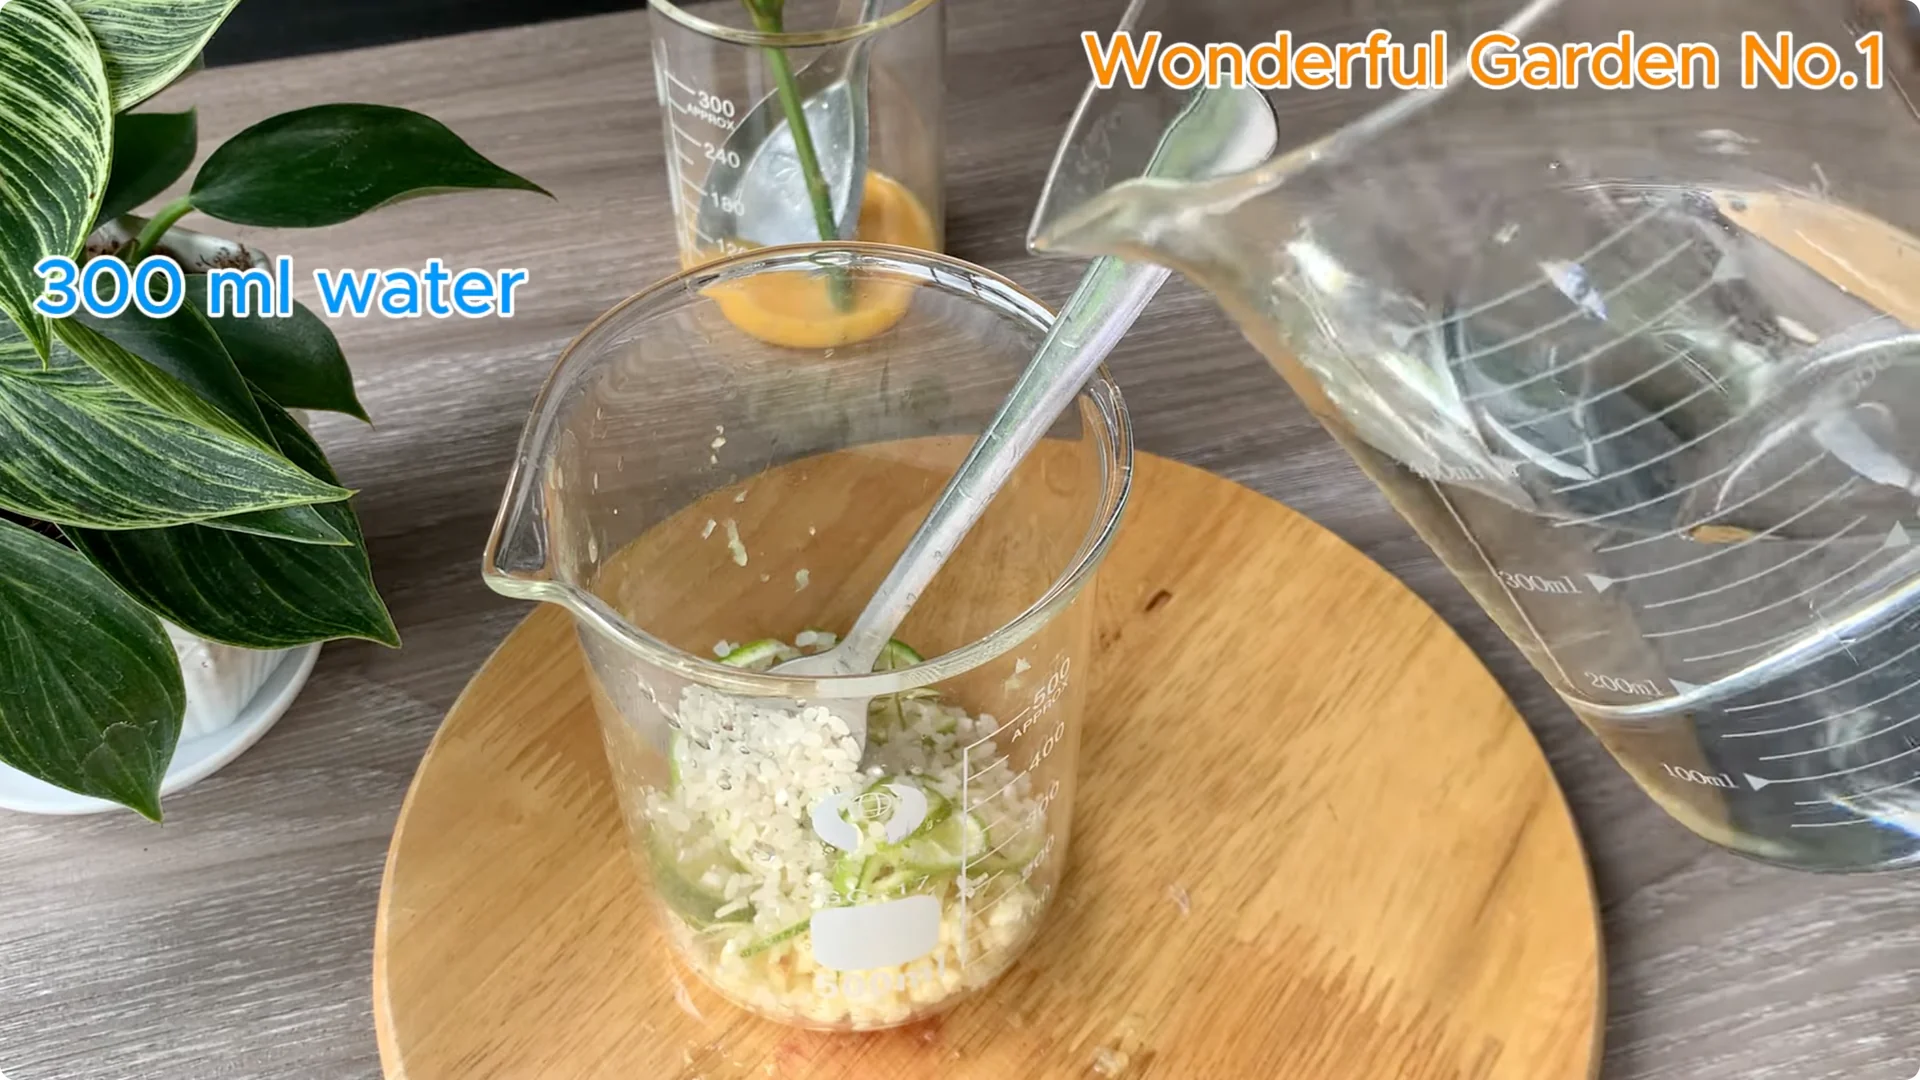
Add 3 tablespoons of rice. Rice may seem unusual, but it contains natural starches and beneficial bacteria that nourish the cuttings and gently stimulate root growth. Finally, pour in 300 milliliters of clean filtered water to combine everything into a mild organic tonic.
Let the mixture rest for a while, giving the natural ingredients time to blend and release their full potential. After resting, it’s time to strain out the solids. Use a fine sieve or a clean loosely woven cloth to gently strain the liquid.
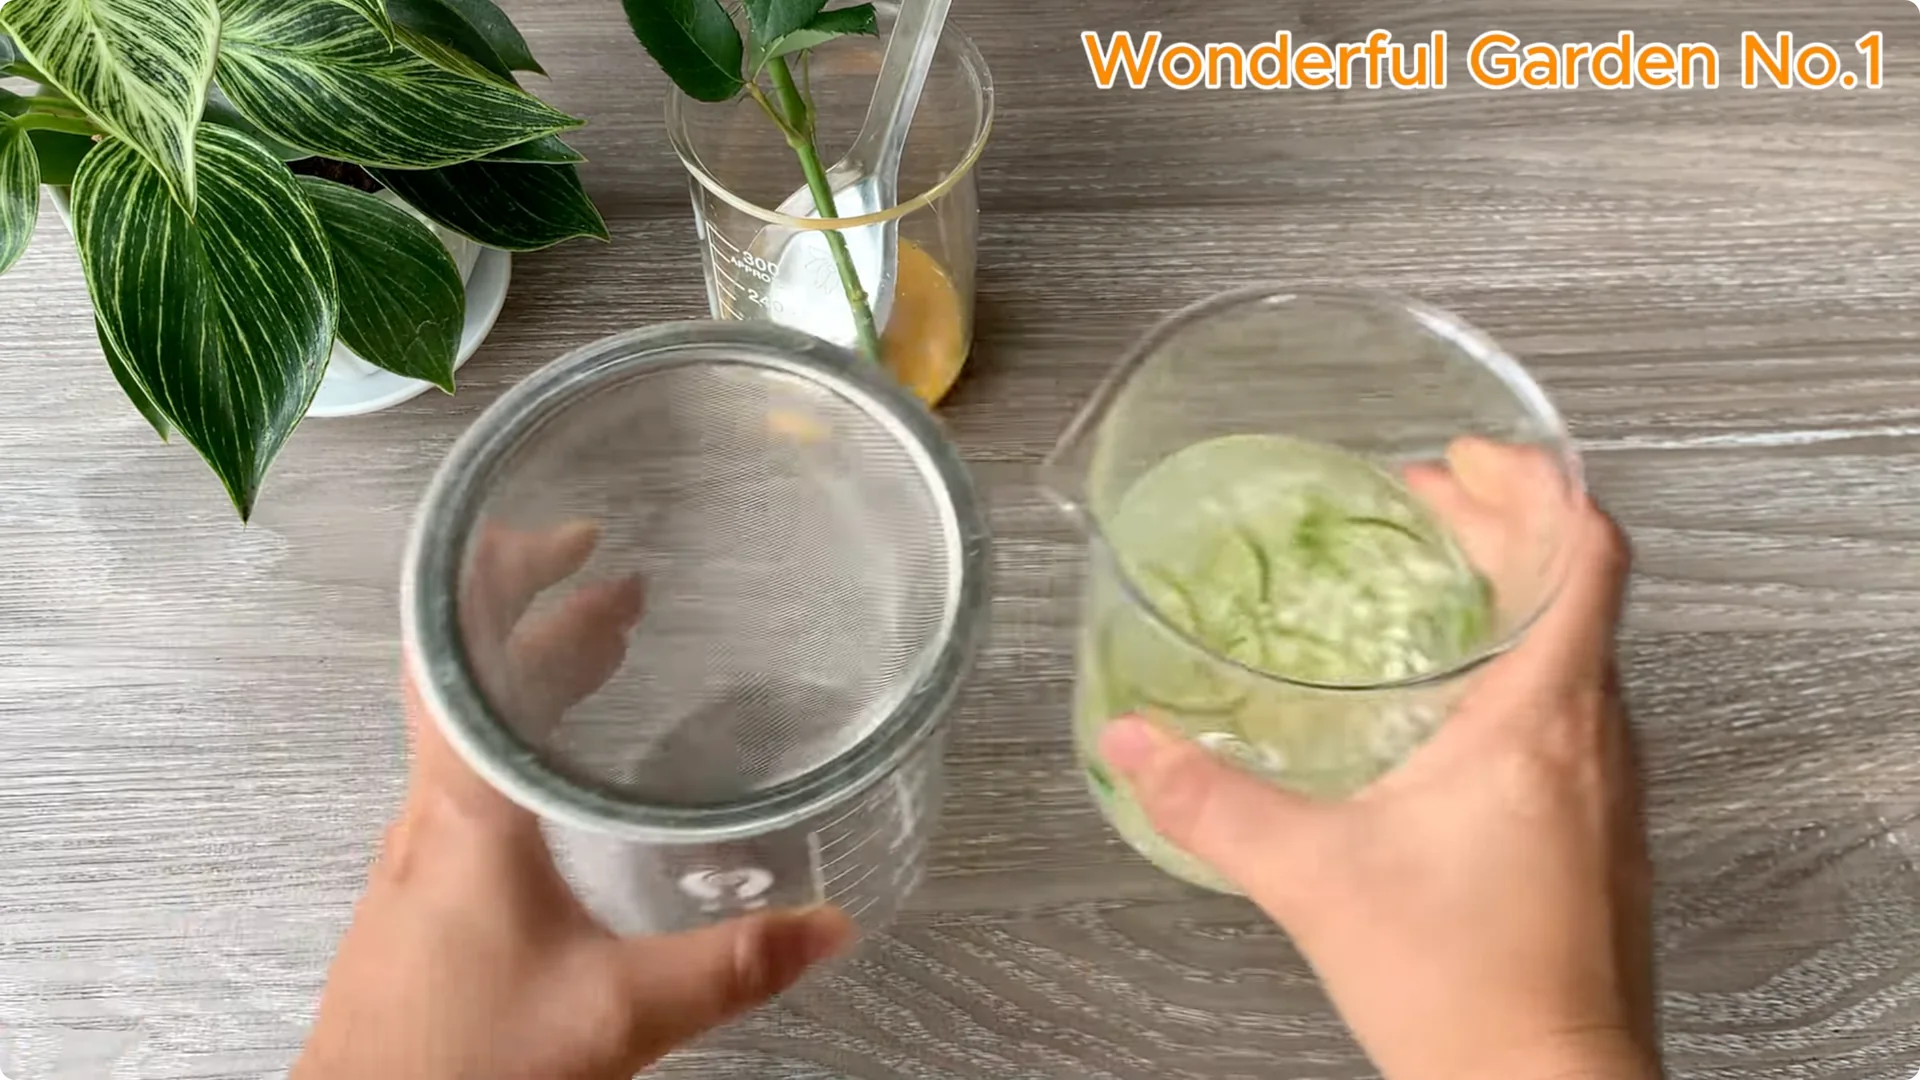
Strain and dilute
Retain only the clear nutrient rich extract, leaving the pulp behind, which has released its nutrients. Next, add 100 milliliters of clean water to the strained solution. This slight dilution keeps it gentle for young rose cuttings while still retaining its natural benefits for healthy root growth.
Our natural rooting solution is ready. It pairs perfectly with a breathable growing medium. Prepare your pot and medium so the cutting settles into a stable, moist home.
3. Rose Cutting Propagation – Growing Medium
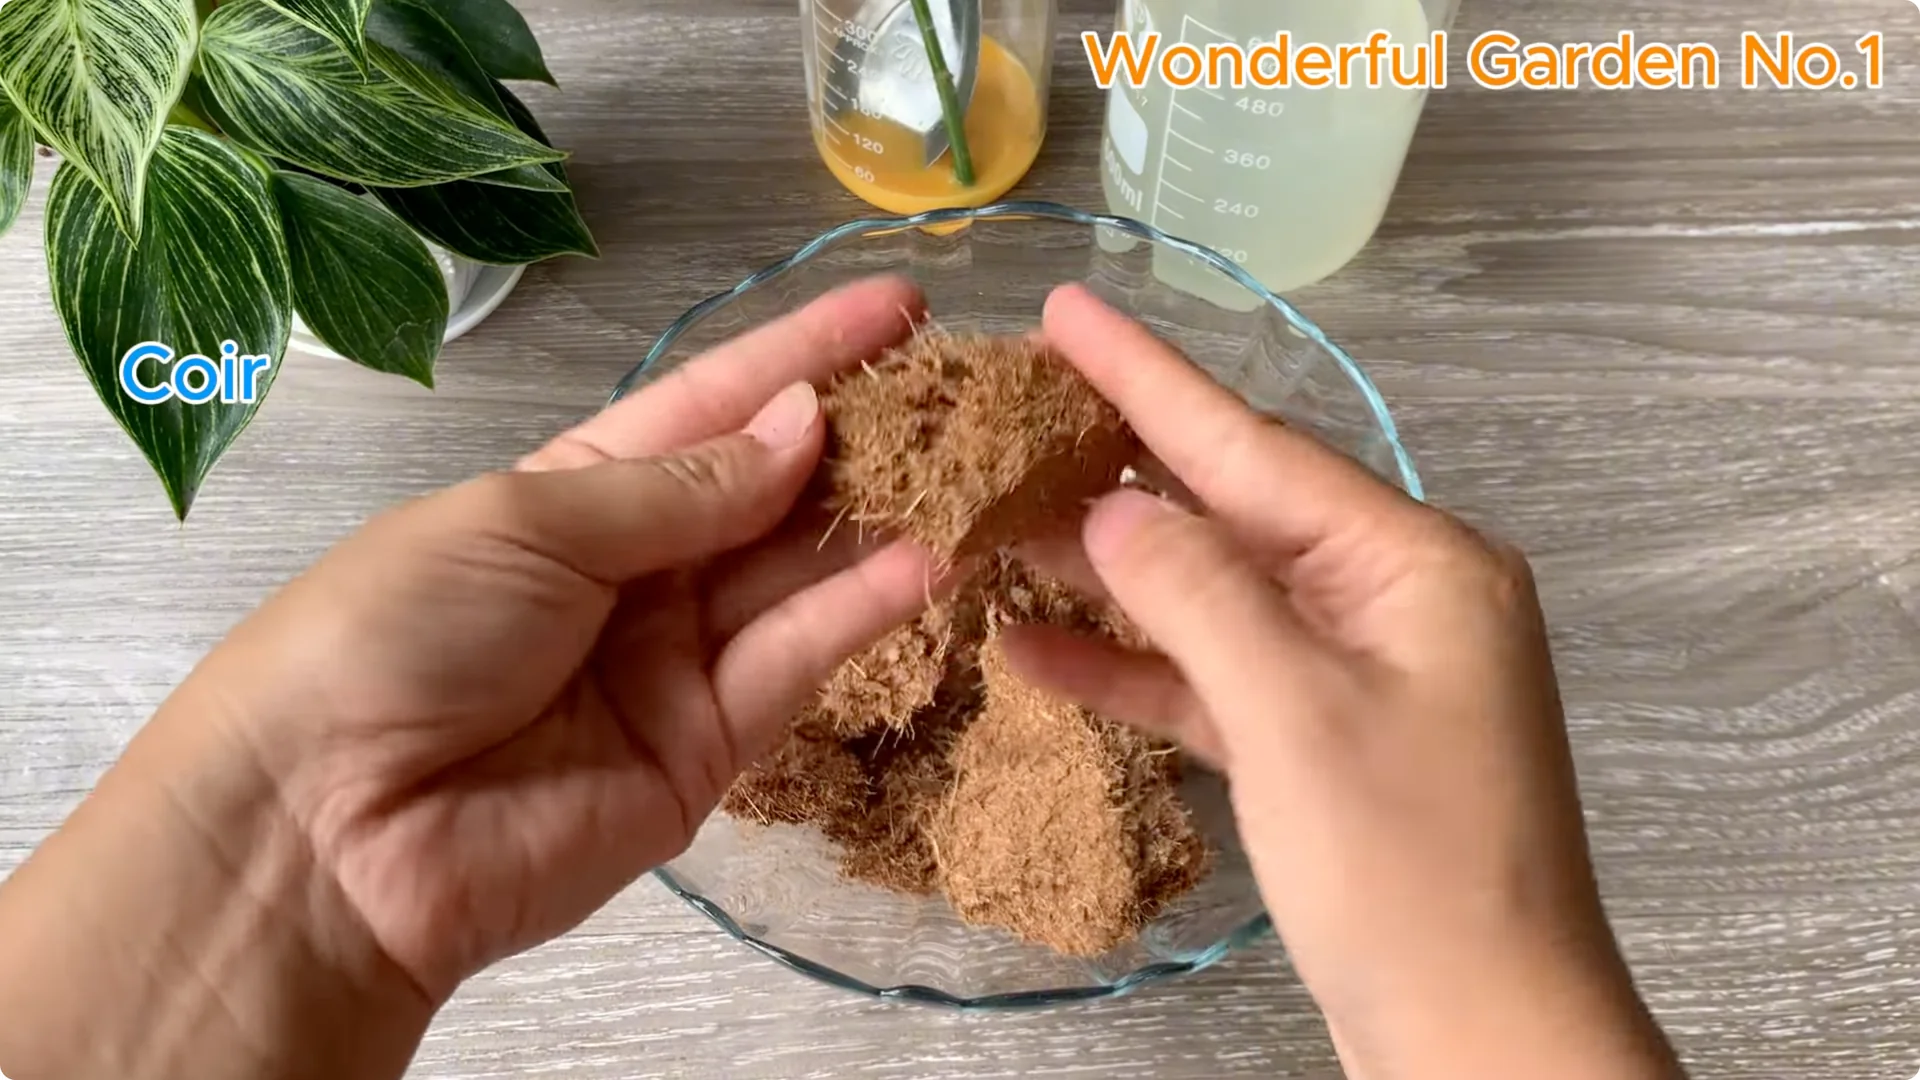
Prepare the coir
For this method I use coconut coir – a breathable medium that retains enough moisture while still allowing the roots to breathe. It’s ideal for rose cuttings. To start, moisten the coconut coir with the rooting solution you just prepared and let it absorb slowly.
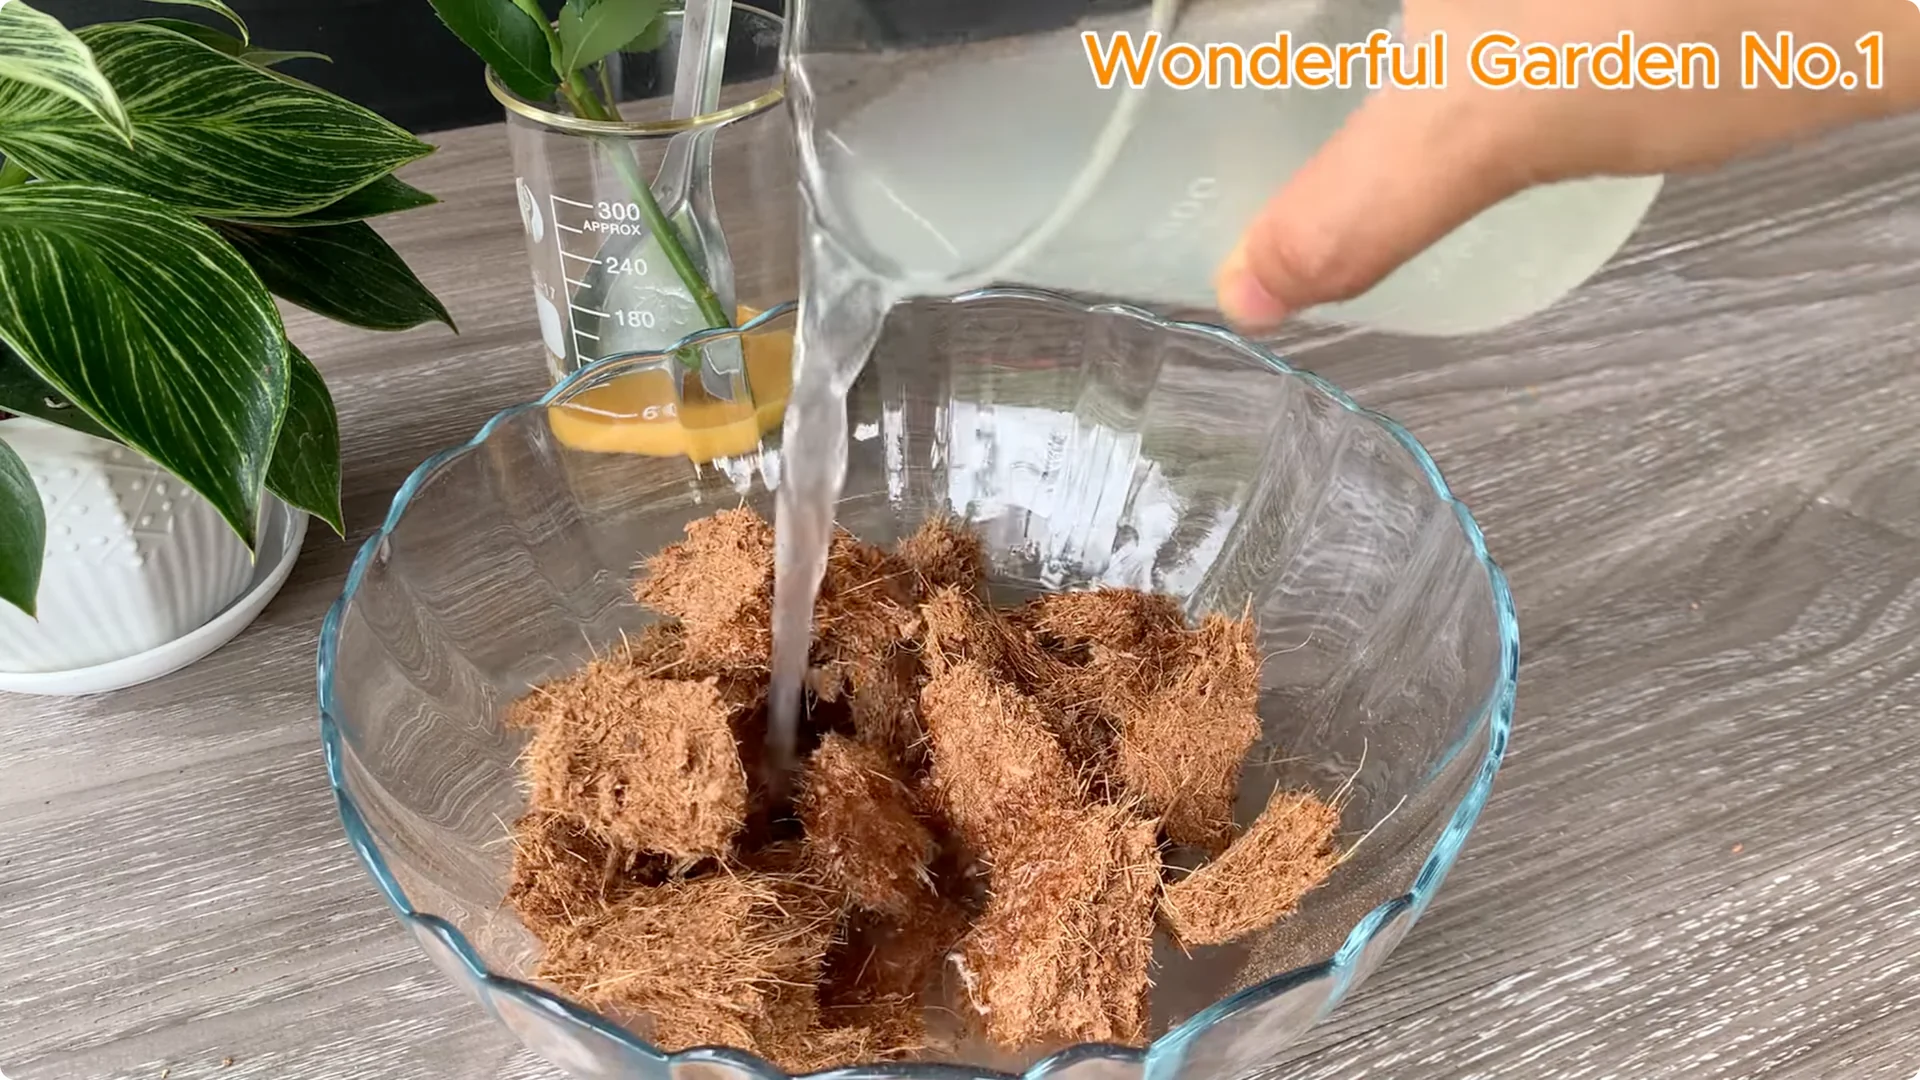
This nourishes the medium and gives your cuttings the best possible start. Next, place the damp coir into a small plastic cup. Make sure the cup has drainage holes in the bottom to prevent excess water from accumulating and causing rot.
Pot and insert
Fill the cup with coir up to the brim, then gently press down with your fingers to create a firm, stable base. Use a small stick or pencil to make a hole in the center of the coir. This allows you to insert the rose stem without damaging its delicate tip.
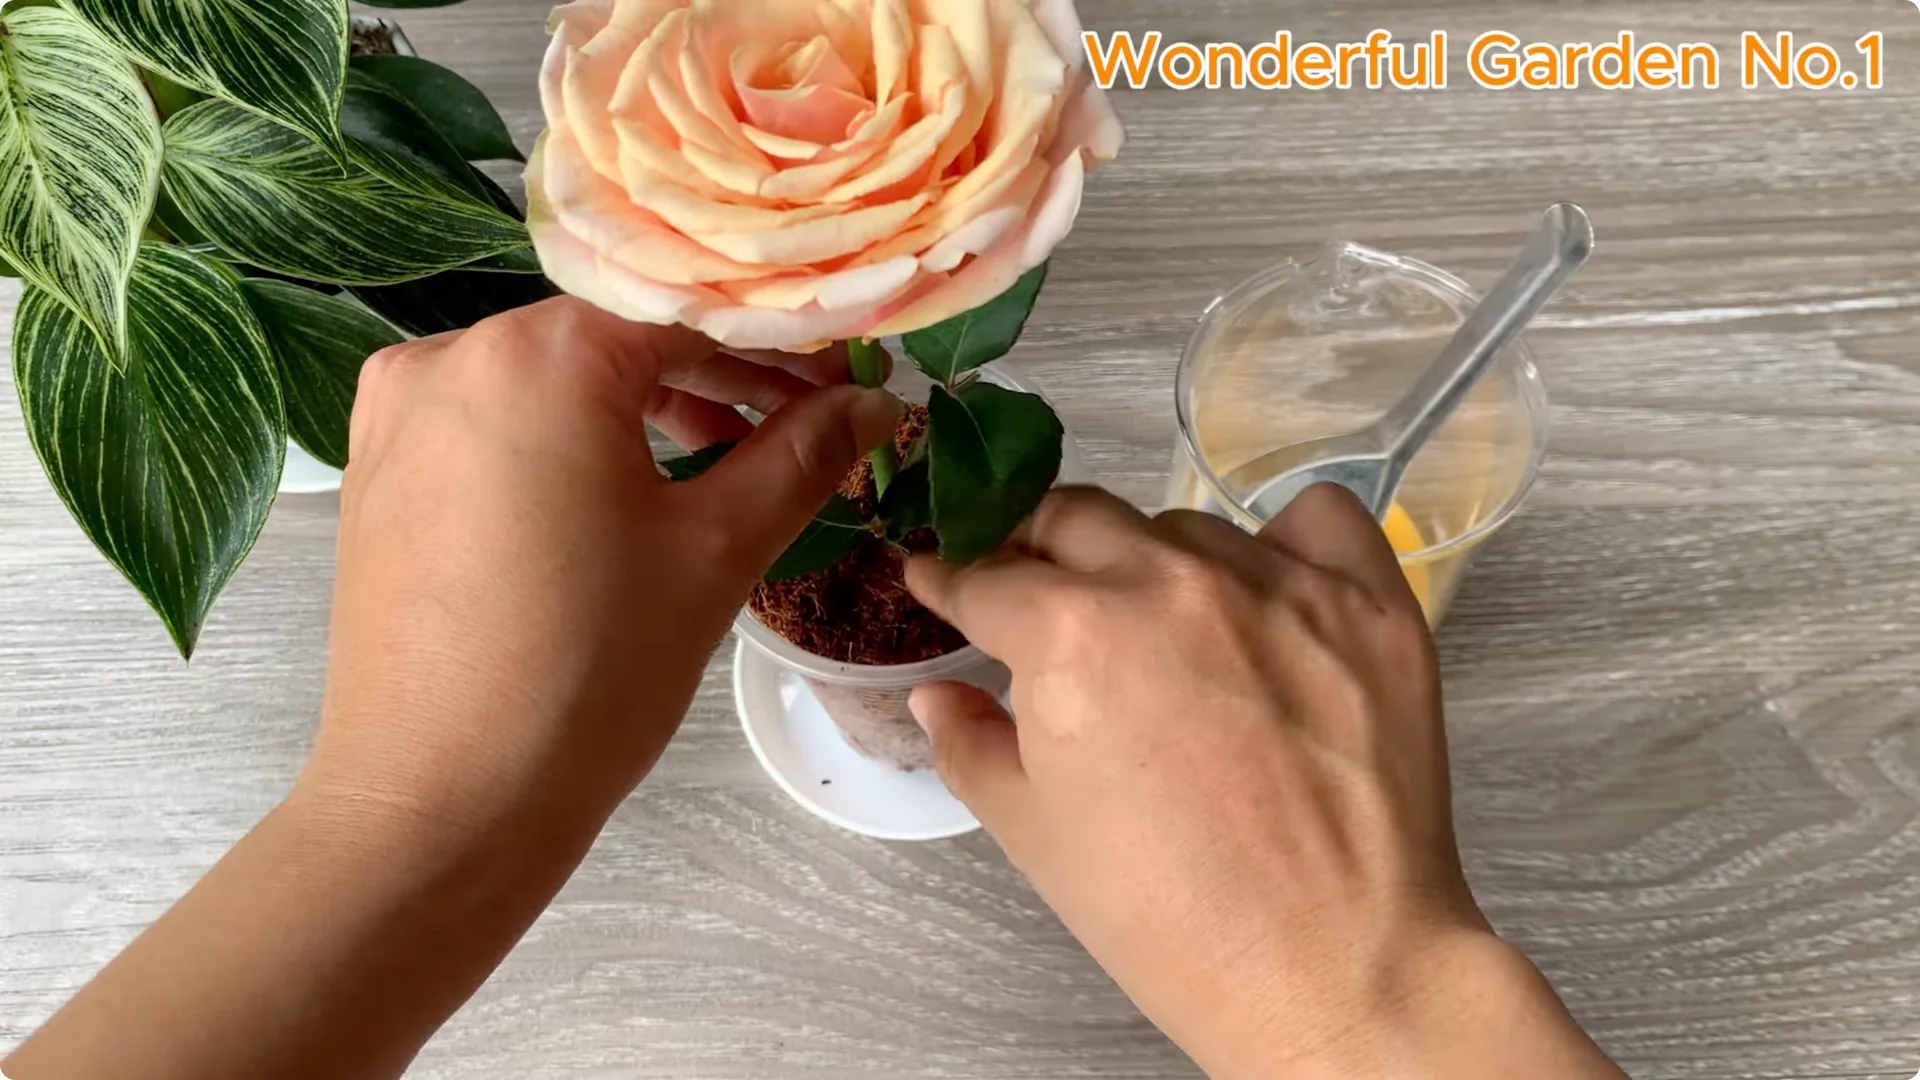
Carefully insert the cutting into the hole and gently press the coir around it to hold it in place. This ensures the stem is evenly exposed to the moist environment, promoting root growth. Keep everything snug but not compressed.
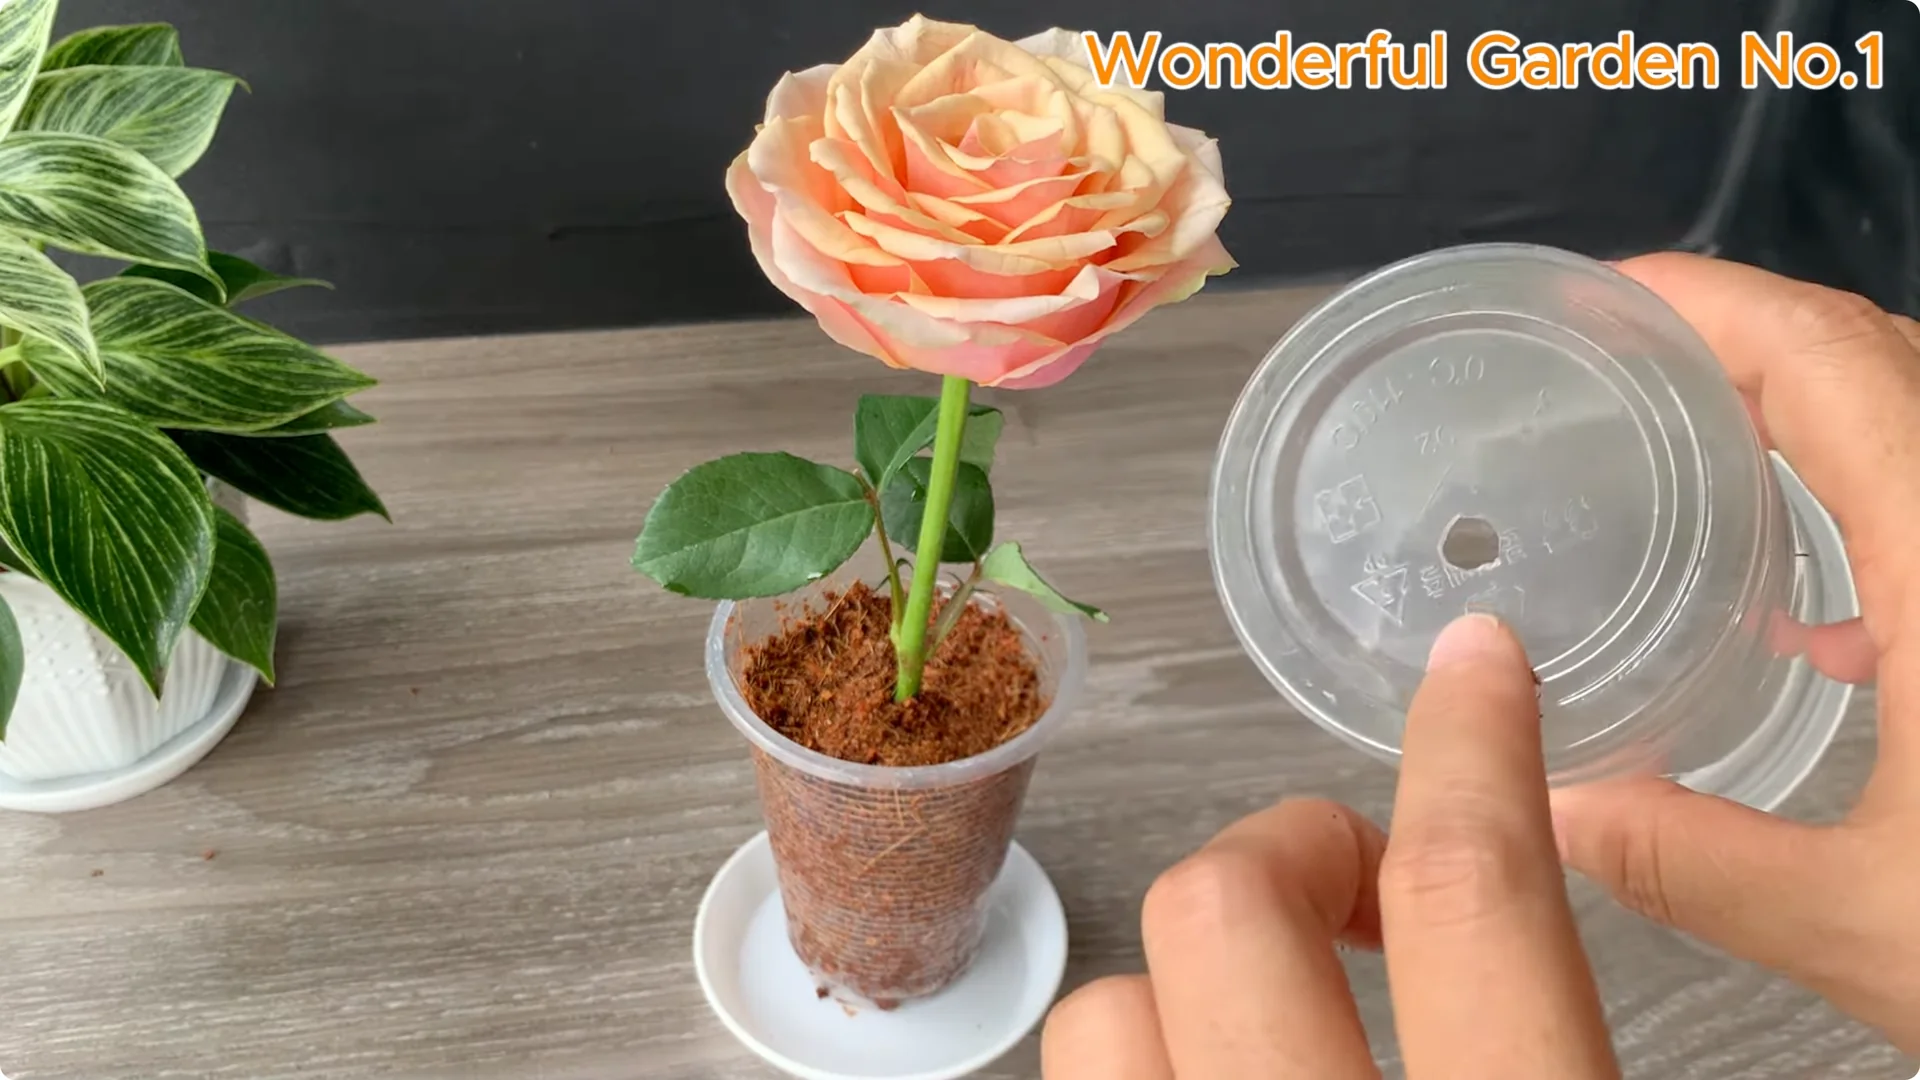
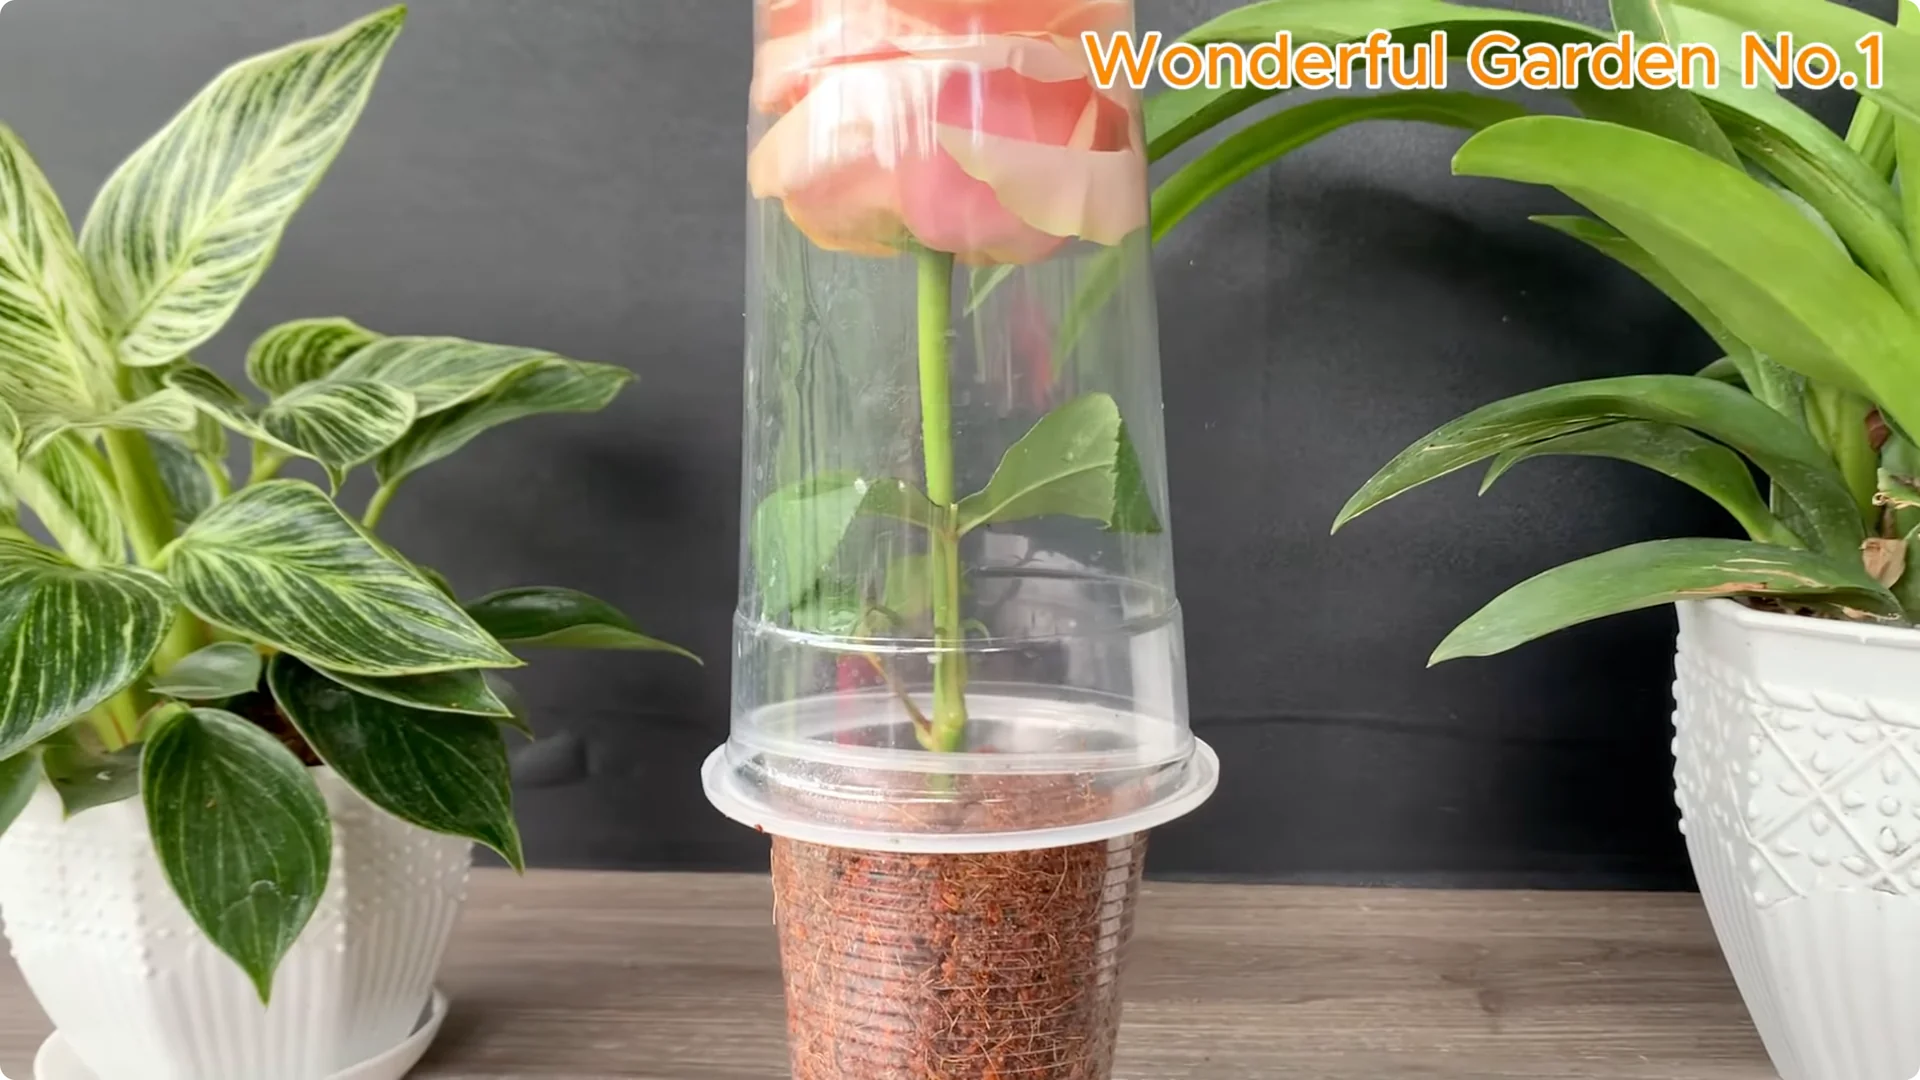
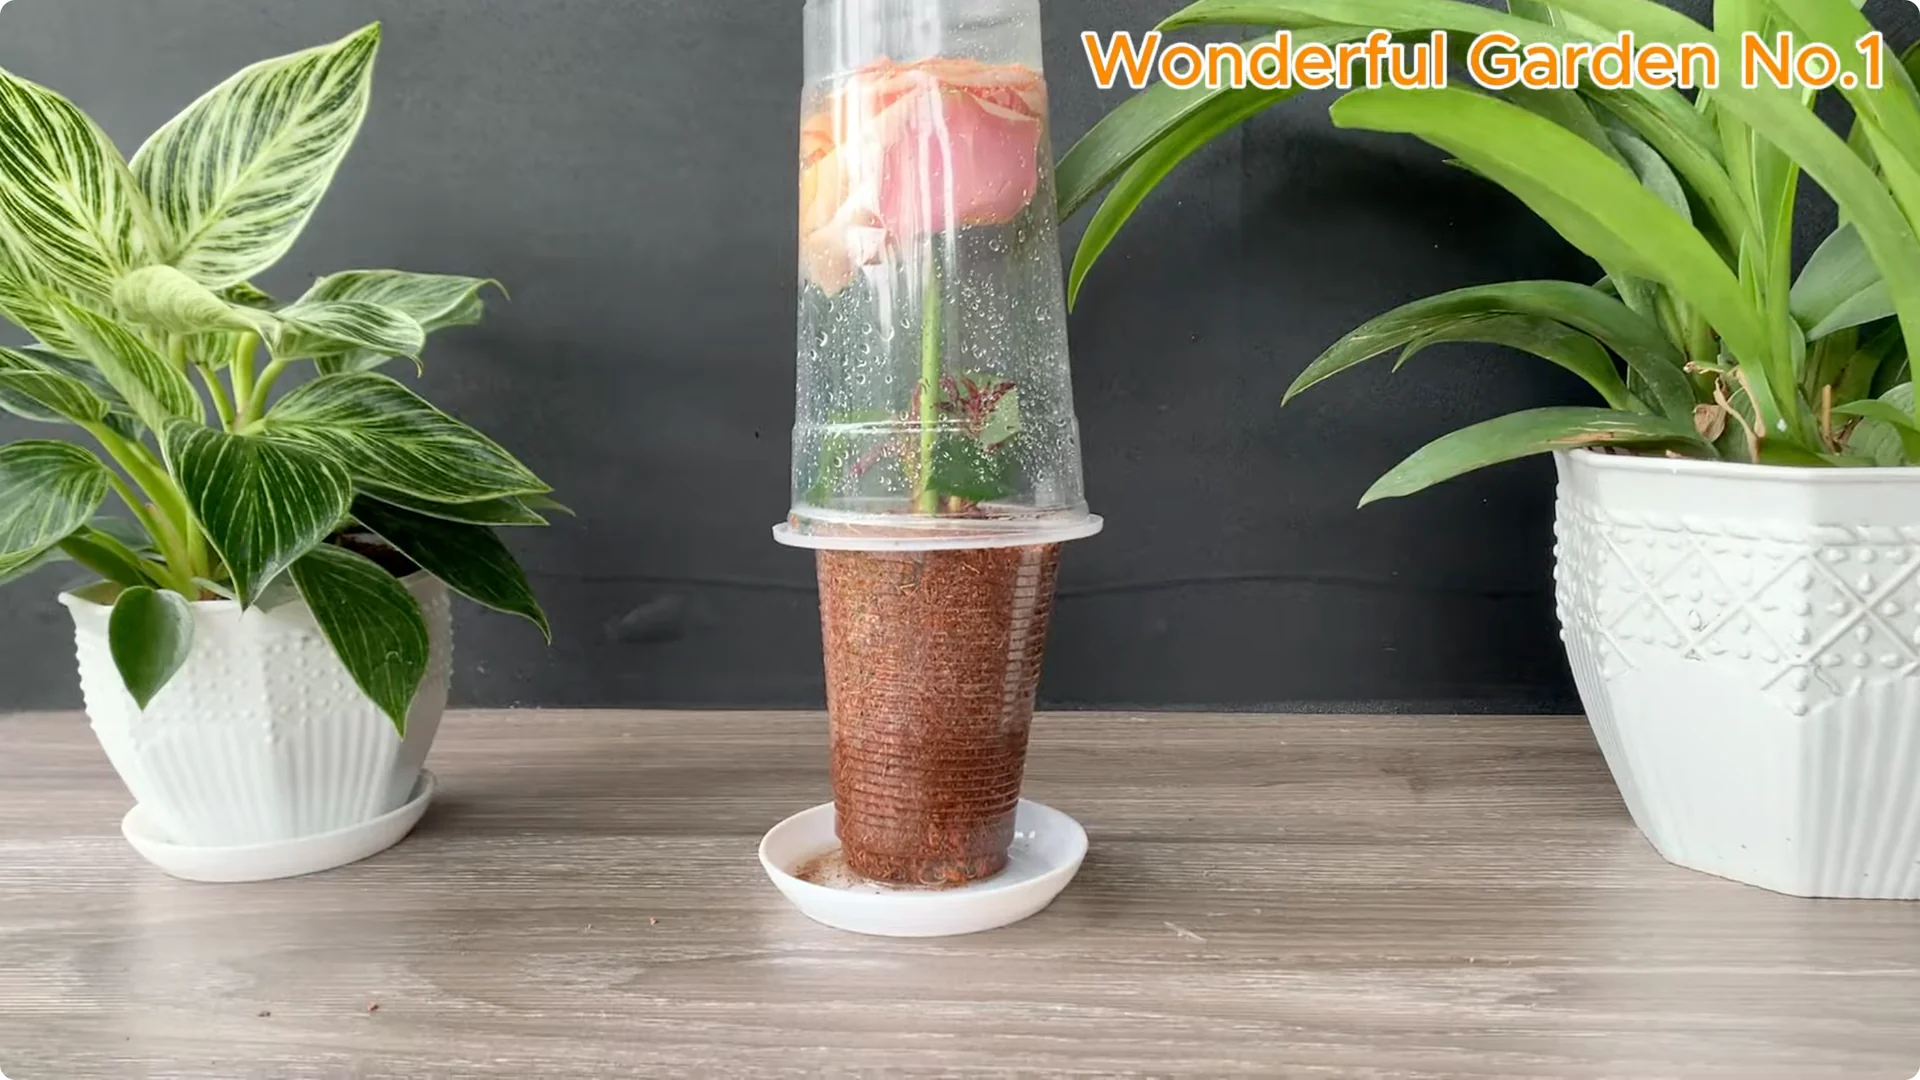
Create a humidity dome
To create a mini greenhouse effect, cover the top with a larger upside down plastic cup. This helps retain moisture – an essential element for successful rooting. Place the cup in a cool, well lit place, but away from direct sunlight and strong winds.
Care for the first weeks
Maintain humidity by keeping the cup upside down for the first 2 to 3 weeks. Leave the lid open for a few minutes each day to prevent mold. When the growing medium is slightly dry, water lightly with the root stimulant or clean water.
Do not let the growing medium become waterlogged. Gentle care is key in this phase. Patience here sets the stage for strong, resilient roots.
Read More: Water Creates 999 Rose Roots Overnight
4. Rose Cutting Propagation – Rooting Timeline
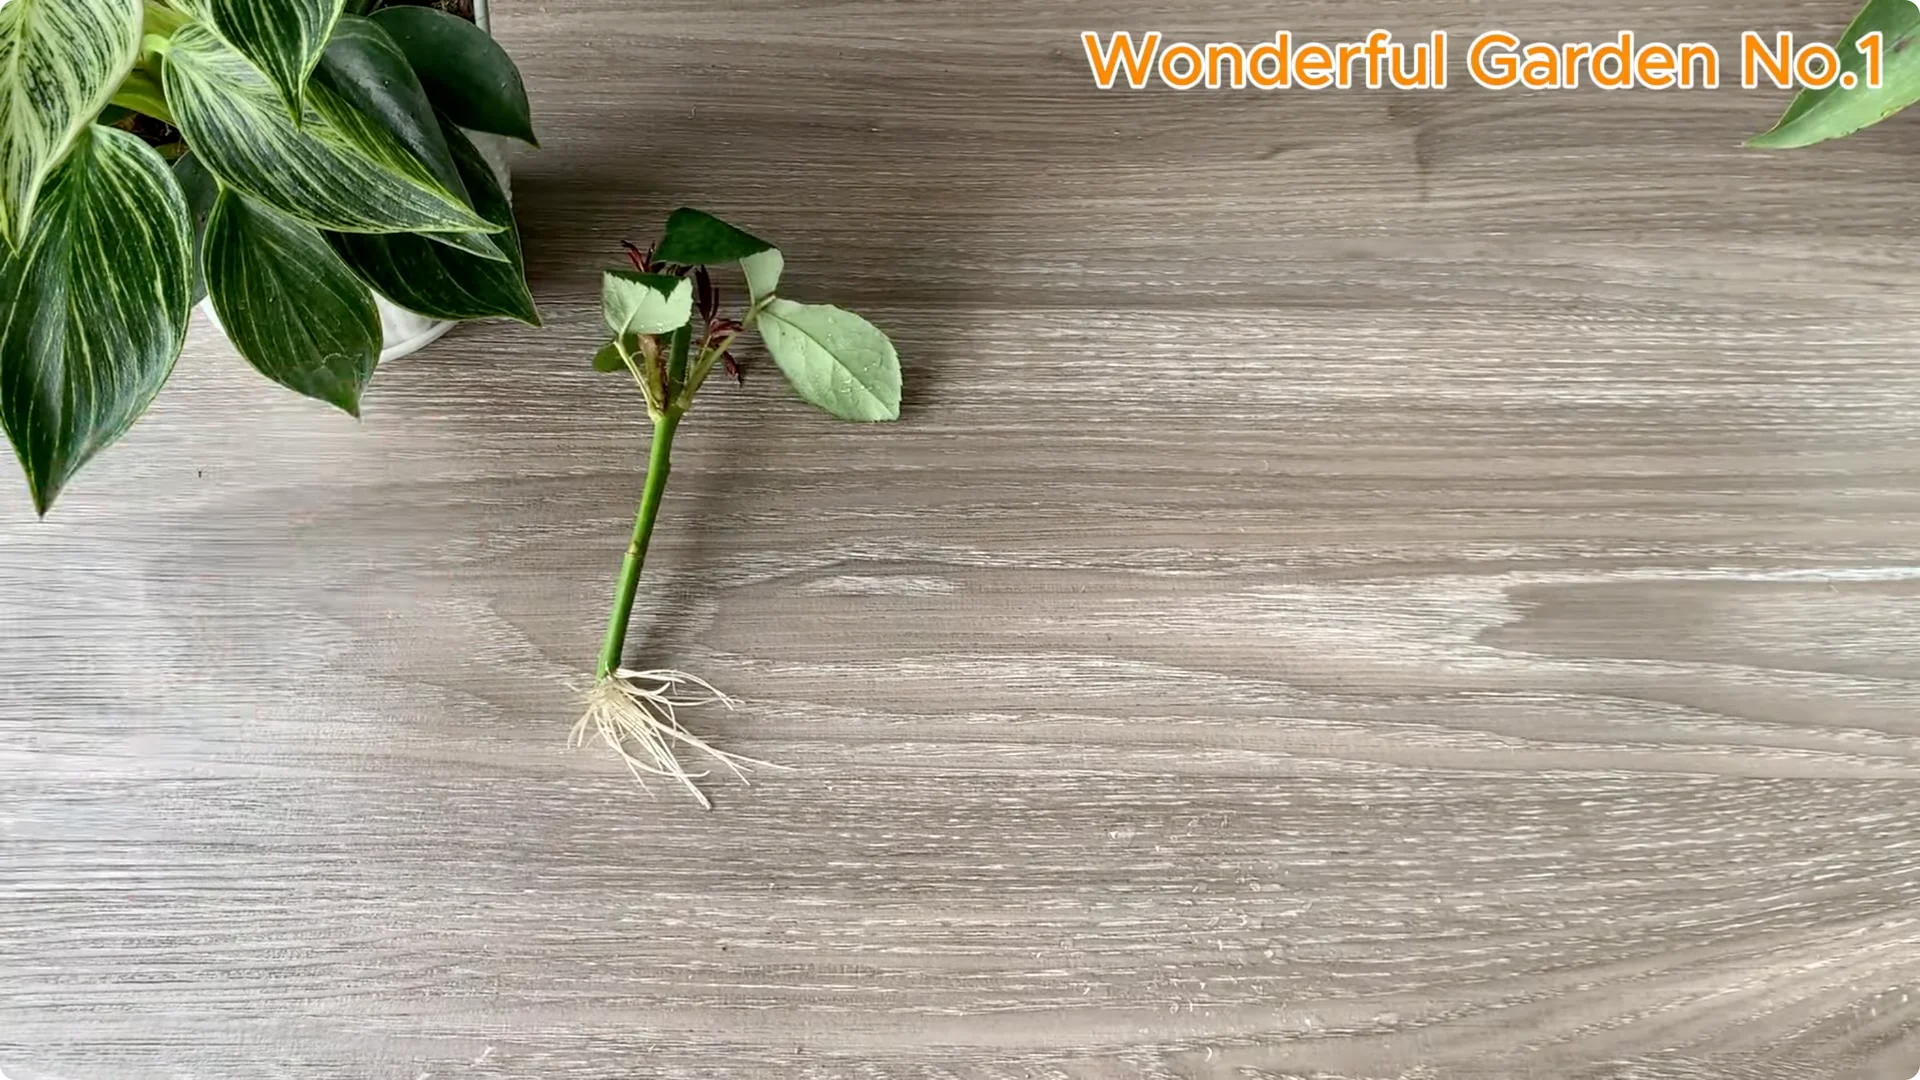
After about three to four weeks, observe closely and you will see encouraging changes. At the leaf nodes where the leaf eyes once hibernated, green buds begin to open. The first young leaves, delicate as silk, gradually spread out in the light.
Beneath the growing medium, fine white roots begin to form, slender and quiet, drawing life from the new environment. This is the first sign that the plant has adapted and begun a new life journey. Roots and buds – two vital lifebloods – are growing together.
From here, a new rose is ready to grow, carrying all the beauty you have silently cultivated. Keep the environment stable until roots thicken. Then prepare for the next step.
5. Rose Cutting Propagation – Potting Up
Give your rose a bit more room in a larger pot. Let it grow steady and strong before facing the open soil. Keep watering light and consistent as the plant settles.
Choose bright, gentle light and protect it from harsh midday sun. Allow the top layer of medium to dry slightly between waterings. Support the young stem if needed to help it grow upright.
Final Thoughts
With a little patience and a few natural ingredients, you have planted the seeds of new life. Egg, lemon, garlic, and rice come together to protect and nurture the cutting while coir and humidity provide the perfect home. Careful preparation and daily attention lead to steady roots, fresh buds, and a ready-to-thrive rose.